After creating your form, click on the Google Sheets tab:

On your Google Drive account, create a new Google Sheet. Save it as something memorable.
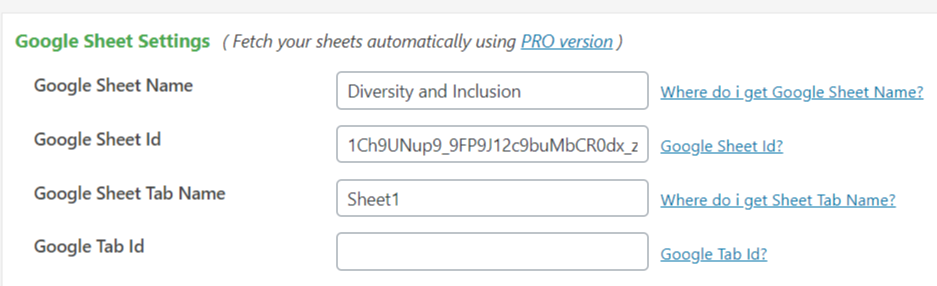
You will need to grab the name of the sheet, the Google Sheet ID (directly from the URL of the sheet), and the Tab name (default is Sheet1).
Paste it in the fields below:
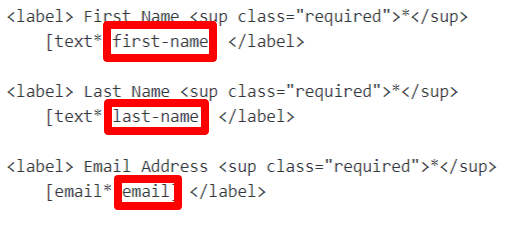
Once you have that, map the column names to the form field names you’ve chosen for your form. Pay close attention to the order of the field names. As you go down the form grabbing names, you need to paste them into the first row, moving from column to column, left to right.
Examples of the fieldnames below:
Test your form first to make sure the data is being pulled into your Google Sheet before releasing the form.