Use this link as a template to create authors who do not work as gmu faculty, but need to be added to the author list for Faculty Working Papers:
https://www.law.gmu.edu/manager/?a=resource/update&id=3329

Use this link as a template to create authors who do not work as gmu faculty, but need to be added to the author list for Faculty Working Papers:
https://www.law.gmu.edu/manager/?a=resource/update&id=3329
The main site homepage is comprised of two different templates.
Slider edits can be made through the “2015_home_banners” template. Must go through Files -> Assets -> Templates to find.
The bottom half of the homepage is through the “2019 Home” template. Must go through Elements -> Templates to find.
Two versions of the Carousel image must be uploaded, the desktop and mobile version.
Approved font for Carousel image is Myriad Pro Condensed Black, but Myriad Pro Condensed Bold is an appropriate substitute.
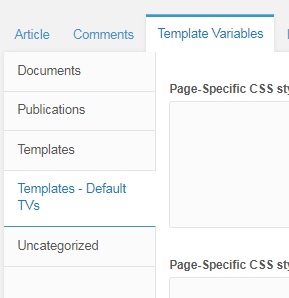
If you’re making an edit to an existing page that has been unpublished in the past, be sure to take an extra look at the “Hide Template Variables on Output” field.
The field is located under most page templates under Template Variables -> Templates – Default TVs:
It varies, but the field in most page templates can be found at the very bottom of the page:
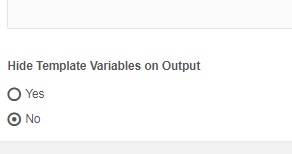
A Template Variable or TV, is simply what MODx calls a custom field found in page creation forms. When this field is set to “Yes” and the page is published, no content will be viewable.
This field is set to “No” by default and should not be a problem when creating new content.
Faculty Working Papers are created in one of two categories. This guide goes over both Law & Economics Working Papers as well as Legal Studies Working Papers.
Step 1. Navigate to the Faculty Working Papers directory on MODx found under: Resources > Publications > Faculty Working Papers
Create a New Article by selecting the New Article button.

Step 2. Name the article using the Article Title field.

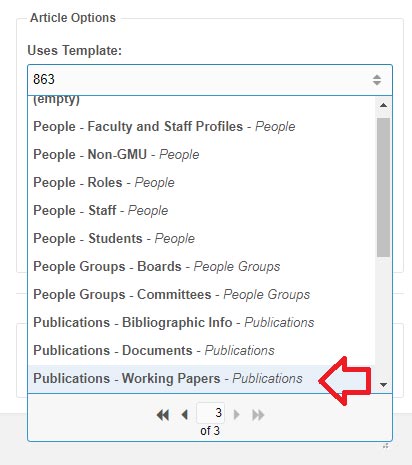
Step 3. Scroll down the same page and under the Uses Template field, select Publications – Working Papers template found on page 3 of the drop down menu.
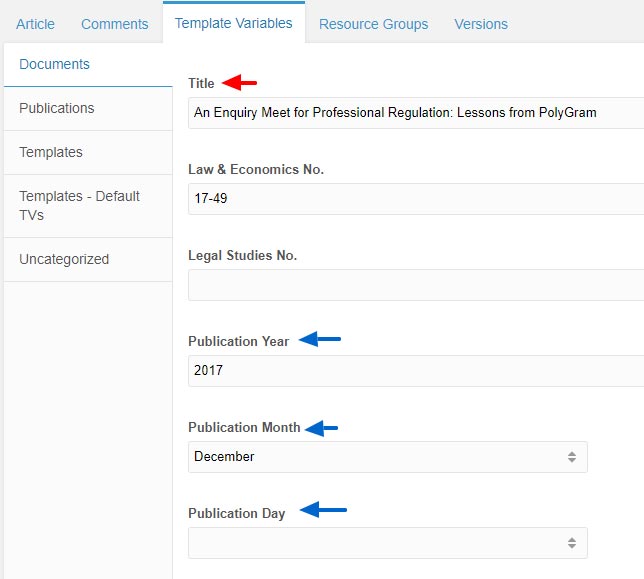
Step 4. Navigate to the Template Variables tab and make sure you are on the Documents sub-section.
Enter the Title & Publication Year/Month/Day
Depending on the category, Either the Law & Economics No. field OR the Legal Studies No. field must be filled in. The naming convention is subject to change. Please contact the Head of Reference and Instructional Services for the most up to date information.
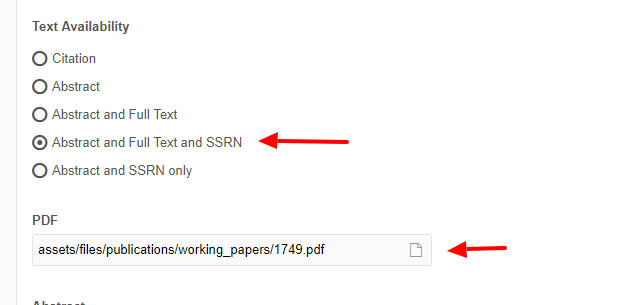
Step 5. Under Text Availability select Abstract and Full Text and SSRN. Almost all working papers include all three items. Then upload a PDF copy of the working paper using the PDF field. Make sure it’s under the publications/working_papers directory.
Step 6. Paste the abstract into the Abstract text field. The abstract is usually included in the working paper. If not, the first paragraph will usually suffice.

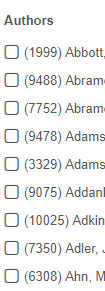
Step 7. Select the Author(s) from the checklist.
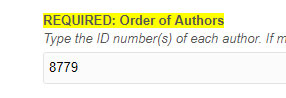
Step 8. In this field, Type the ID numbers of each author. If there are multiple authors, separate each by a comma (e.g.: 123,456,789). Do not include a blank space between IDs.
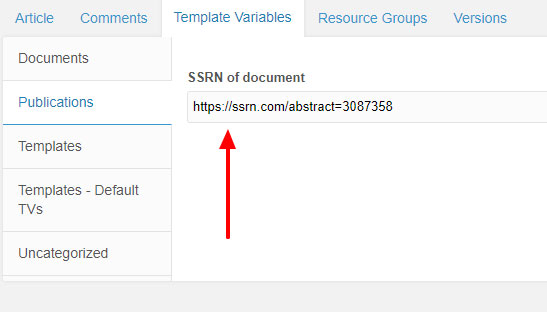
Step 9. Scroll back to the top and select the Publications sub-section, still under Template Variables. Under SSRN Of Document, paste the SSRN link provided to you. This link is provided usually provided by a Scalia Law staff member.
Step 10. Finally, select Save to publish the Working Paper.
Shortcodes make it easier to customize wordpress pages quickly. WordPress comes with pre-built shortcodes but we’re going to build one from scratch. You will need to add a function to your child theme’s functions.php file. This particular code builds an ordered list of all our wordpress sites under our sls.gmu.edu domain using the get_sites() function. This function will work on all WP platforms 4.3 and above.
    /*

    * Author: Matthew

    * This function creates a shortcode usable in all sites using the scalia law theme to create an ordered list of

    all multisites

    */

    function scalia_list_sites() {
$subsites = get_sites(); //creates variable using get_sites
if ( ! empty ( $subsites ) ) {
$html = '
foreach( $subsites as $subsite ) {
$subsite_id = $subsite->blog_id; //finds sites by id
$subsite_name = get_blog_details( $subsite_id )->blogname; //creates variable for site name
$subsite_link = get_blog_details( $subsite_id )->siteurl; //creates variable for site url
$html .= '< li class="site-' . $subsite_id . '">< a href="' . $subsite_link . '">' . $subsite_name . '< /a >< /li >'; //builds individual list items
sort($html);
}
$html .= '< /ol >';
return $html; //returns the list
}
}
add_shortcode('scalia_list', 'scalia_list_sites'); //calls function and sets up [ scalia_list ] custom short code
This goes in your child-theme’s functions.php file.
This is specific to the Monthly Dean’s List Mailings found here.
1. Create a Resource using the News template. Give it a Title, Long Title, and Resource Alias.
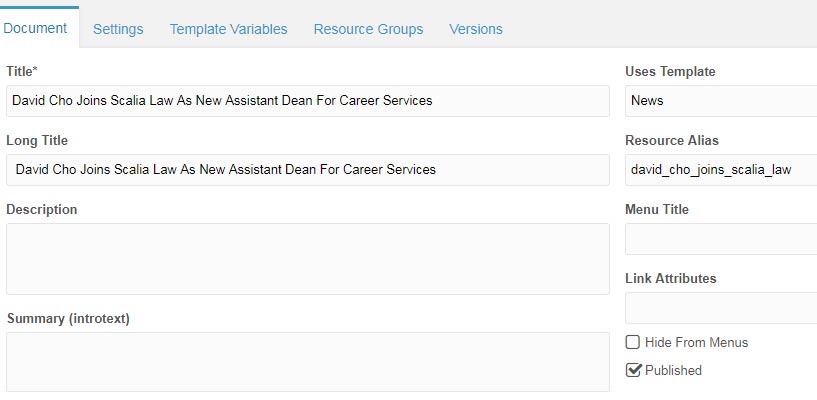
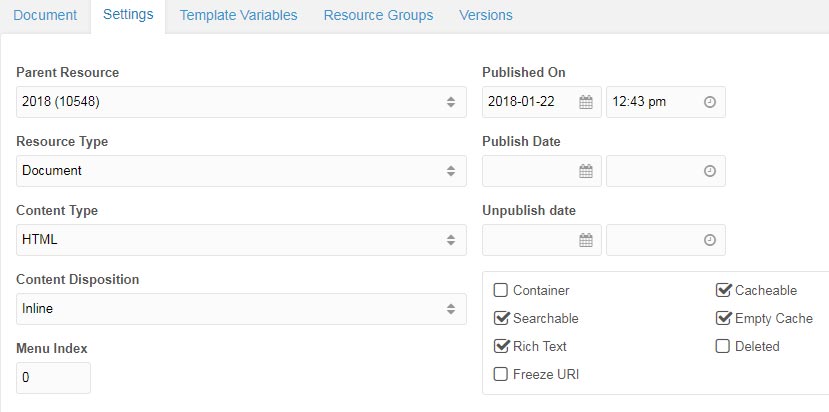
2. On the Settings Tab, make sure the Parent Resource corresponds to the News>Year. The Published On field will be used to sort the article. Use the date the Mailing was delivered.
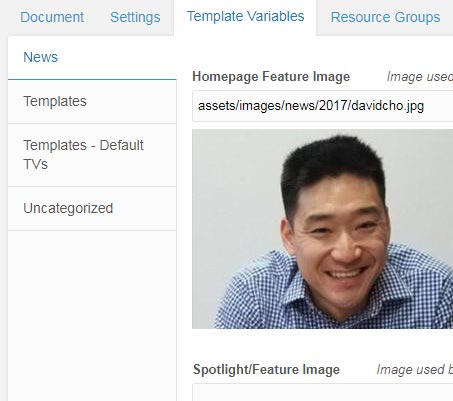
3. Under Template Variables, include an image (400px wide by 250px high). Copy and paste a blurb for the Spotlight/Feature Summary (usually the first sentence). Enter the Publication Date. Check off the categorie(s) that correspond to the article on the Categories list. Under Content, paste the entire article.
4. If an image needs to be included, upload the image and use the following code template:
<figure class="floatleft">

<img src="assets/images/news/mossoff_adam.jpg" alt="Professor Adam Mossoff" />

<figcaption>Professor Adam Mossoff</figcaption>

</figure>
Step 1: Create a New Document
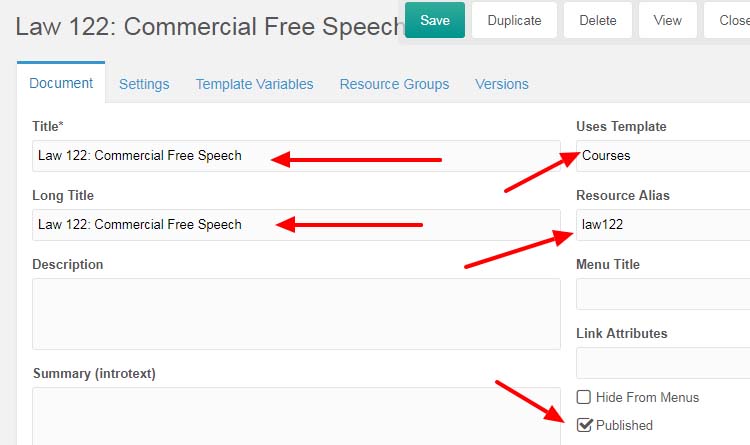
Step 2: Use the Courses Template and Fill in the Title, Long Title, & Resource Title with the course name. The Published checkbox is unchecked by default. Make sure to check it and hit save when you are complete.
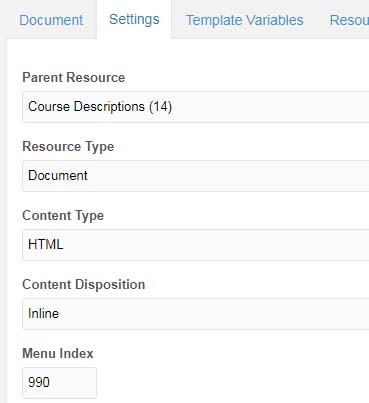
Step 3: Under the Settings Tab, use the following field entries in each field to keep all courses.
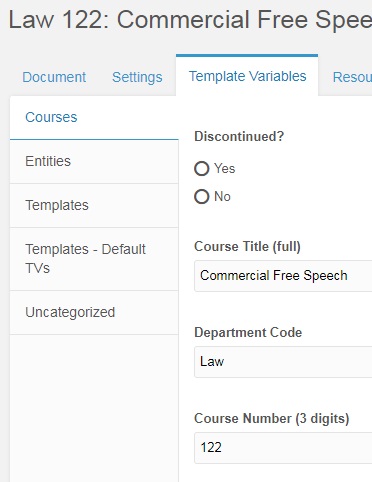
Step 4: Under the Template Variables Tab -> Courses Sub-Tab fill in the following fields: Course Title, Department Code, Course Number, Credit Hours (minimum), Credit Hours (maximum), Subject Category, and Prerequisites (if applicable).
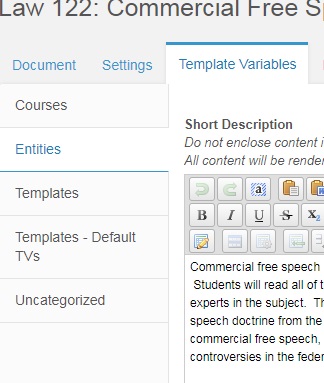
Step 5: Under Template Variables Tab -> Entities Sub-Tab, Copy and paste the course description under Short Description.
Optional: If you would like to hide the side bar, the option is under Templates-Default TVs as Hide Side Navigation.

Step 6: When finalized, make sure the Published checkbox is checked under the Document tab and Click on the green Save button.

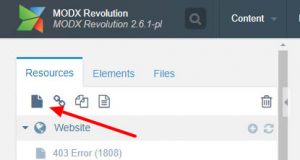
Step 1: Create a new Document by clicking on the Document icon under the MODX search bar.
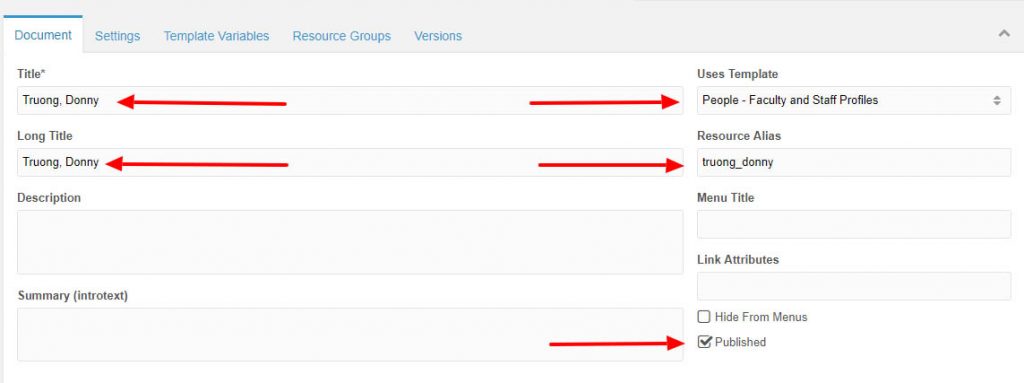
Step 2: Under the Document Tab, select the “People – Faculty and Staff Profiles” Template. Then enter the staff member’s Name under Title, Long Title, and Resource Alias in the format shown below. Please note that the Published checkbox will not be selected by default. When the Bio is complete, this box will need to be checked.
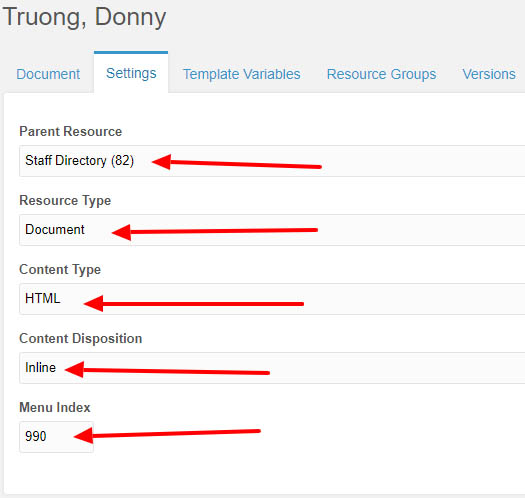
Step 3: Under the Settings Tab, Select the Parent Resource, and make sure the Resource Type, Content Type, Content Disposition and Menu Index have the following inputs:
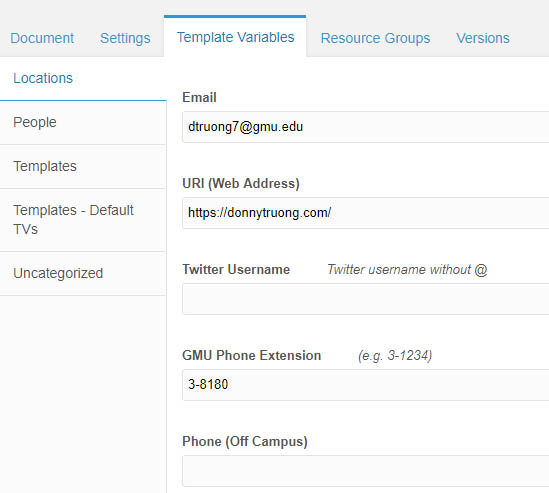
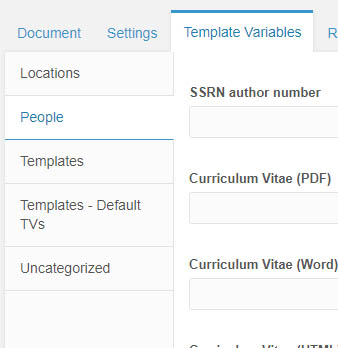
Step 4: The Template Variables tab will hold the majority of information for the Staff Member. Start with the Locations sub-tab. Here you will enter the Email, GMU Phone Extension, and Office Number. Please note the phone extension must follow the correct format (3-xxxx).
Step 5: The People sub-tab under Template Variables is very important. Start with the First Name, Middle Name, Last Name, to title the Staff page. A staff banner photo may be uploaded to the Photo Large area when a photo is available.
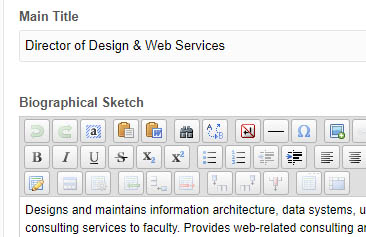
Scrolling down the People tab, enter the Staff Member’s professional title under Main Title, and include the Bio under Biographical Sketch. For Faculty, please select an Area of Expertise and Subjects Taught.
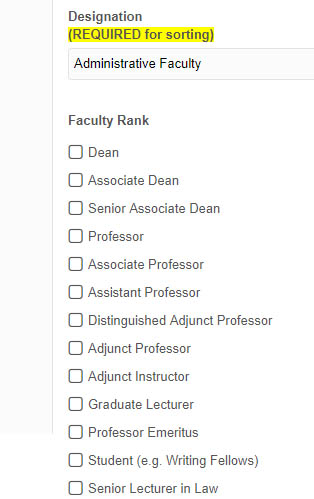
Further down, select the Designation, Faculty Rank, Highest Degree Obtained. and Alma Mater. You may enter up to six additional degrees in this section.
Step 6. (Optional) To remove the sidebar which is set by default, scroll back up to the sub-tab area and select Templates – Default TVs. From there select Yes from Hide Side Navigation.

At this point the Staff Bio page has all the required information to display correctly. You will need to select the green SAVE button found at the very top of the page to save your work and publish your page.
Optional: You may add additional information such as uploading a resume, including a professional website link, or Twitter username found in the People and Locations sub-tab, respectively.
For example, replace J.D. or L.L.M to JD or LLM.
Here’s the JavaScript method:
<script>

function removePeriods() {

    var str = document.getElementById("c_degrees").innerHTML;

    var res = str.replace(/\./g, "");

    document.getElementById("c_degrees").innerHTML = res;

}

window.onload = removePeriods;

</script>
To do it in MODX, create a chunk called FixDegrees:
A.B.:AB,A.M.:AM,B.A.:BA,B.B.A.:BBA,B.C.:BC,B.Com.:BCom,B.E.E.:BEE,B.I.E.:BIE,B.F.A.,BFA:B.L.:BL,B.M.:BM,B.M.E.:BME,B.S.:BS,B.S.E.:BSE,B.S.E.E.:BSEE,D.Jur.:DJur,D.O.:DO,J.D.:JD,J.S.D.:JSD,J.S.P.:JSP,Ed.D.:EdD,Ed.S.:EdS,LL.B.:LLB,LL.D.:LLD,LL.L.:LLL,LL.M.:LLM,M.A.:MA,M.A.S.:MAS,M.B.A.:MBA,M.Ed:MEd,M.Fc.:MFc,M.L.I.S.:MLIS,M.L.S.:MLS,M.D.:MD,M.Ed.:MEd,M.S.:MS,M.Sc.:MSc,M.S.E.E.:MSEE,M.S.L.S.:MSLS,M.T.:MT,P.G.C.E.:PGCE,Ph.D.:PhD,Cert. of Legal Educ.:Cert of Legal Educ,M.P.P.:MPP,S.J.D.:SLD
Than create a snippet called ReplaceDegrees:
<?php

$find = array();

$replace = array();
$line = $modx->getChunk('FixDegrees');
$pairs = array_map('trim', explode(',', $line));
foreach($pairs as $pair) {
if (strpos($pair, ':') === false) {
$pair = $pair . ':';
}
$couple = array_map('trim', explode(':', $pair));
$find[] = $couple[0];
$replace[] = $couple[1];
}
return str_replace($find, $replace , $input);
Call the snippet in the template:
[[*bio:ReplaceDegrees]]
Please refer to this short six minute video to get an overview of the WordPress Dashboard.
A more comprehensive look at the WordPress Dashboard is found below:
Of course, we are here to help. If you have any questions, please contact one the web administrators and we’ll gladly walk you through the process.
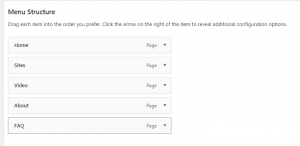
The Menu settings are found on the left side of the WordPress Dashboard under Appearance->Menus.
To the left of this page you will see various categories of items you may add to the Menu, such as pages or custom links. Simply check off the page you would like to add and click on Add to Menu for pages, or copy and paste a URL and give it a title under custom links.
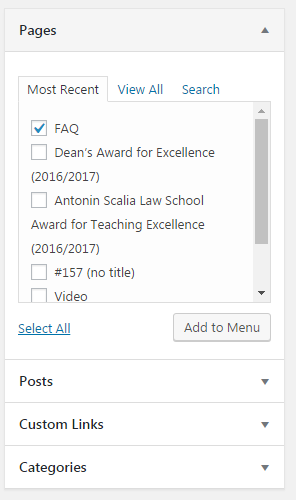
Once the Page or Link has been added to the Menu Structure window to the right, you may drag your selection up or down to prioritize your menu items. Dragging the item slightly to the right while under another item will create a child/parent item relationship making organization of links easier than ever.
Sidebar content is called a Widget in WordPress nomenclature. Widgets can be found under Appearance-> Widgets. In order to add sidebar content to a page, you must first create the Widget in the Sidebar category.
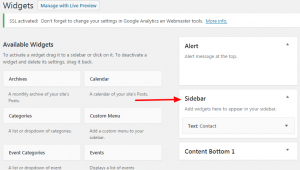
Once the content has been created, you will need to add to the page. Under every editor view of a page, you will see the Custom Sidebar menu. Activate it by checking off the menu item, then select the Sidebar Radio button.

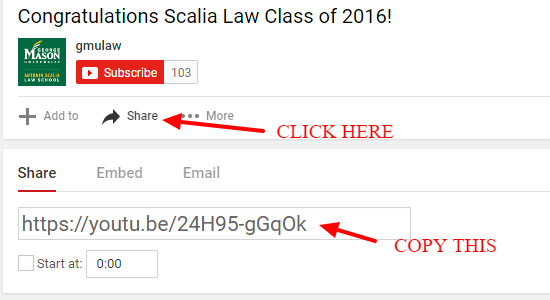
On any YouTube video, click on the Share button underneath the subscribe button. From there, simply copy and paste the Share link into the Edit Page window.
For Vimeo, copy the video URL and paste it into the Edit Page window. Example:
https://vimeo.com/220470204