George Mason University Antonin Scalia Law School

How to Post Around the Law School Photos

We recently added a new section on the homepage call Around the Law School to showcase photos from our Flickr account. Here’s the instructions for updating the photos:

  1. Choose the best photo from the Flickr album we want to showcase. Create a photo with the dimensions of  600px by 400px.
  2. Log into MODX then navigate to the Around the Law School (ID#13628) directory
  3. Pick an existing resource and duplicate it. Paste in the text that corresponds to the banner (this text will also be use for the alt tag). Check the Mark All Unpublished radio button, then hit Save
  4. Go to the new duplicated resource, make sure the Title and Long Title are the same
  5. Go to the Template Variable tab, upload the photo to Homepage Feature Image field (see screenshot)
  6. Scroll down to URL for In the News and enter a URL for the Flickr Album.
  7. Go back to the Document tab,  activate the Published radio button and then hit Save. To remove the banner from the line up, deactivate the Published and then hit Save or delete the resource.

Adding Class Notes in MODX

Instructions for adding Class Notes in MODX

  1. Navigate to the Class Notes directory (ID12416)
  2. Right click on an existing alumni, choose Duplicate from the dropdown.  Add a new name (last name, comma, first name. Example: smith, john). Check Redirect to duplicate. Select Make all unpublished. Hit Save.
  3. On the Document tab, change the name in the Long Title field with first name than last name (Example: John Smith).
  4. Go to Template Variables tab,  upload the alumni photo to Homepage Feature Image field. Make sure the image is 400px by 250px. If no photo is provided, use the default image: assets/images/alumni/thumbs/class_notes.png
  5. Enter text in the Spotlight Summary field.
  6. Scroll down to the Class Year field, add the year in digits. Example: 1991
  7. Return to the Document tab, activate the Published button, enter the Publish On date, then hit the Save button.

How to Post Homepage Hero Banners

The hero banners are randomly loaded each time a visitor land on our homepage. Here are the steps to publish or unpublished them:

  1. Create two banners: desktop (1600px by 800px) & mobile (400px by 600px)
  2. Log into MODX then navigate to the Home Banners (ID#12335) directory
  3. Pick an existing resource and duplicate it. Paste in the text that corresponds to the banner (this text will also be use for the alt tag). Check the Mark All Unpublished radio button, then hit Save
  4. Go to the new duplicated resource, make sure the Title and Long Title are the same
  5. Go to the Template Variable tab, upload the desktop version to Homepage Feature Image field and the mobile version to Spotlight/Feature Image (see screenshot)
  6. Scroll down to URL for In the News and enter a URL. A URL is required. If there’s no URL, the link will be defaulted to the homepage
  7. Go back to the Document tab,  activate the Published radio button and then hit Save. To remove the banner from the line up, deactivate the Published and then hit Save or delete the resource.

How to Disable Plugins Outside MODX Manager

Since we are using CAS Authentication plugin to add an extra security layer to our MODX Manager, we need a way to disable the plugin in case something goes wrong and we don’t want to get locked out of our own site. Here are the steps to disable plugins outside the Manager:

  1. Log into the cloud dashboard and temporarily add phpMyAdmin to the cloud
  2. Log into phpMyAdmin, browse the modx_site_plugins table for the CAS plugin, double-click on the disable column to change the value from 0 to 1 to disable the plugin
  3. Manually clear the cache by logging into sFTP and delete everything in the core/cache directory
  4. Log back into the cloud dashboard to turn off phpMyAdmin

Creating a Spreadsheet for Full-time Faculty

A request to pull the following information from the full-time faculty directory:

  • Last Name
  • First Name
  • Title
  • Degrees and Schools
  • SSRN link
  • Subjects taught
  • Area(s) of Expertise
  • CV (PDF link if they have one posted)
  • Email
  • Bio (link to profile page)

Create a chunk (ditto.faculty_list_2021_ABA) using tr and td tags:

<tr>
<td>[[+lname]]</td>
<td>[[+pref_name:default=`[[+fname]]`]]</td>
<td>[[+title_main]]</td>
<td>[[+degree6:isnot=``:then=`[[+degree6:ReplaceDegrees]]`]][[+alma_mater6:isnot=``:then=`, [[+alma_mater6]]; `]][[+degree5:isnot=``:then=`[[+degree5:ReplaceDegrees]]`]][[+alma_mater5:isnot=``:then=`, [[+alma_mater5]]; `]][[+degree4:isnot=``:then=`[[+degree4:ReplaceDegrees]]`]][[+alma_mater4:isnot=``:then=`, [[+alma_mater4]]; `]][[+degree3:isnot=``:then=`[[+degree3:ReplaceDegrees]]`]][[+alma_mater3:isnot=``:then=`, [[+alma_mater3]]; `]][[+degree2:isnot=``:then=`[[+degree2:ReplaceDegrees]]`]][[+alma_mater2:isnot=``:then=`, [[+alma_mater2]]; `]][[+degree1:ReplaceDegrees]][[+alma_mater1:isnot=``:then=`, [[+alma_mater1]]`]]</td>
<td>[[+ssrn:isnot=``:then=`https://ssrn.com/author=[[+ssrn]]`]]</td>
<td>[[+faculty_subject_category:convert_ids_to_pagetitles_1]]</td>
<td>[[+expertise:convert_output_list_1]]</td>
<td>[[+cv_pdf:isnot=``:then=`https://www.law.gmu.edu/[[+cv_pdf]]`]]</td>
<td>[[+email]]</td>
<td>https://www.law.gmu.edu/faculty/directory/fulltime/[[+alias]]</td>
</tr>

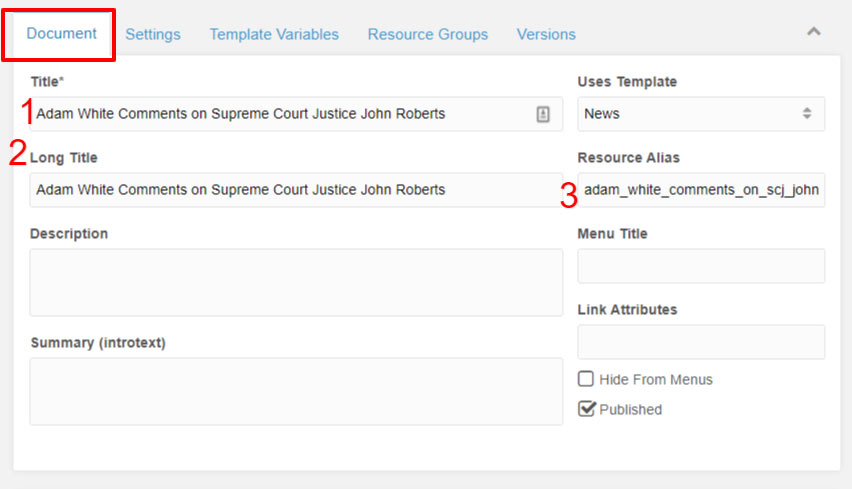
The square brackets ([[+lname]]) correspond with the form field inside MODX. To see how the fields were created, take a look at the 2015_faculty_profile chunk.

After creating the ditto.faculty_list_2021_ABA chunk, put it inside the script below:

<table>
[[getResources? &showHidden=`1` &includeTVs=`1` &tvPrefix=`` &limit=`0` &sortbyTV=`lname` &sortdirTV=`ASC` &parents=`5842` &depth=`1` &tpl=`ditto.faculty_list_2021_ABA` &sortBy=`lname` &sortDir=`ASC` &display=`all` &filter=`hide_all,1,2`]]
</table>

Past the script above on any page inside MODX to populate the table. The tag &parents=`5842` refers to the ID number of the full-time faculty directory.

Creating “In the News” Content

“In the News” content can be found under Resource ID 11086 and should be contained within the year of posting.

The simplest way to create an “In the News” item is to duplicate an existing resource from an existing faculty. Once you make a duplication, uncheck the published radio button to prevent the resource from showing up in the public

In fields 1 and 2, enter the headline of the content. For consistency, do not preface the name with “Professor”.

In field 3, enter a readable url that matches with the title of the content.

On the Template Variables tab, scroll down to “URL for in the News”. Enter the link to the article, and be sure to include the Source in the “Source for in the News” field below:

MODx comments

MODx comments will not appear when viewing the source code of a page. This is especially useful when trying to keep old banners on the homepage while having it out of sight.

To use MODx comments, use the following syntax:

[[- ]]

Course Schedule Conversion for MODX

This tutorial walks through the steps to convert course schedule from Excel file into MODX.

  1. Open up the original Excel file (provided by Deborah), merge multiple faculty into one row, then delete all the empty rows.
  2. Open up the Course Schedule Sample Excel file
  3. Copy and paste each column such as Course Title, Credit, and Course Number into the sample Excel file. Do it for both Day and Evening courses.
  4. Once everything is in place, copy all (except for row 1) from the Excel file to an HTML editor:

    <div class="table-wrap">
    <table id="course-schedule" class="sortable" border="1" cellspacing="0">
    <tbody>
    <tr>
    <th>Sched.</th>
    <th>Course Name</th>
    <th>Num. (Sec.) CRN</th>
    <th>Instructor(s)</th>
    <th class="unsortable">Days, Time</th>
    <th>Final Exam</th>
    <th class="unsortable">Syllabus</th>
    </tr>
    <!--SCHEDULE STARTS HERE-->
    <!--Paste the table from Excel into here-->
    <!--SCHEDULE ENDS HERE-->
    </tbody>
    </table>
    </div><!--end table-wrap-->

  5. Save as an HTML file and view it in the browser. Clean up all the extra spaces using Search & Replace. For examples: ( 3 cr) to (3cr) and ( 001 ) to (001)
  6. Next, perform Search & Replace for notes items: //, (W), (E), +, and (N.1) to (N.9)


    <a href="[[~[[*id]]]]#permission" title="With witten permission of instructor only.">//</a>

    <a href="[[~[[*id]]]]#writing" title="This course has been designated as a writing course.">(W)</a>

    <a href="[[~[[*id]]]]#experimental" title="This course has been designated as an experiential course.">(E)</a>

    <a href="[[~[[*id]]]]#prerequisites" title="This course has prerequisites.">+</a>

    <a href="[[~[[*id]]]]#n1" title="See Note 1">(N.1)</a>

    Note that (N.1) to (N.9) are different for Day than Evening. For Evening change the anchor ID from #n1 to #n1-eve.

  7. Copy and paste notes from the original Excel file to the bottom of the HTML page. Reformat the notes to include all the anchor links.
  8. Once everything looks good, paste into MODX

    Change text case

    This step is not required, but here’s are tips for change the case of text in Excel.

Full-Time Faculty Table

The Full Time Faculty Table implements one ditto that calls two separate chunks.

The chunks are:

ditto.people_finder.odd.tr.2018

and

ditto.people_finder.even.tr.2018

The structure of both dittos are the same, with only the row background color being different using the existing even and odd classes within the main style sheet.

When calling the ditto, filter the results using:

&parents=`5842,1794`

This sorts the list based on Faculty Type.

When adding fields use the + sign instead of the usual *, so to add the professor’s title, it would look like this:

[[+title_main]]

To integrate a link, use this format:

<a href="mailto:[[+email]]"">[[+email]] </a>

Main Site Top Navigation Bar

Assigning new pages to different sections of the site are done within the resource itself under Template Variables.

However, adding sections to the Top Navigation Bar requires manually editing a Chunks within MODX.

To add a new Admissions Program to the Admissions section, for example, Navigate to Elements, select Chunks, then Navigation, and select the nav_admissions chunk to manually add the page. Be sure to use Resource IDs in place of the URL.